Wednesday, December 15, 2010

Announcing Fabulous DigitalProTalk Holiday Specials! 25% to 70% Off!

Holiday Sale - LR

That’s right folks, as promised, we are announcing our first Holiday Sale here at DPT and the deals are awesome while our supplies last!  Hit any of the images below or the link right here to see all our Holiday Specials! We’ve even got FREE Worldwide Shipping on our Ultimate Bundle listed below!

The sale ends at the end of the year on December 31, 2010, so don’t miss out! Check out the specials and 25% to 70% savings below.
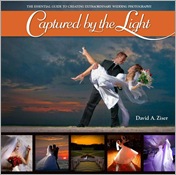
DAZ Wedding BookCaptured By The Light  - How To Take Extraordinary Wedding Photographs for only $29!

An autographed copy of my hugely popular book “Captured By The Light” for only $29!! That’s the best price on planet earth for a book that has been called “…the best book ever written on wedding photography.”

Already own a copy, then this is the perfect gift for a fellow photo buddy.

The Zumbrella – Now Only $29.00
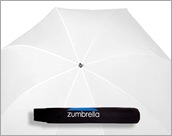
0009-Store-IMG_8167-EditThis is by far the best price we have ever offered on my Zumbrella.  Last year, my Zumbrella was the best selling shoot through umbrella anywhere.  I made Scott Kelby’s Gonzo Gift Guide list.  It was the favorite flash accessory for both our Digital WakeUp Call Tour last year and our Captured By The Light Tour this year.

At this price, pick up two.  Don’t forget to add on an umbrella bracket too.
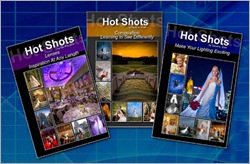
Hot Shots -3a“Hot Shots” 3 Set Series: The Photographers Quick Reference Guides, only $59.00

When we made my 3 “Hot Shots” series available the second half of last year, photographers could not get enough of them and we sold out! We reordered for my CBTL2010 tour and still have a few left at this fantastic price.

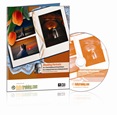
DVD_LiveWeddingShoot_3D_0810flat copyLive Wedding Shoot: From Start to Finish, only $49

This DVD raises the training bar once again by doing the one thing aspiring wedding photographers everywhere have been asking for. In Live Wedding Shoot: From Start to Finish, you become the “virtual assistant” as I take you through my entire day at an actual wedding.

Rapid-Fire Tips & Tricks Wedding Photography, only $49
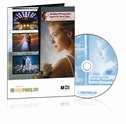
DVD_RapidFireTips&Tricks(Mock)_3D_0610This DVD is jam-packed with a wealth of wedding photography tips and tricks discovered over the years. Essentially, this DVD allows you to skip years of trial and error and go directly to the perfected results.

Make Your Lighting Exciting 2-DVD Set, only $39 for both DVDs

Disc 1: 15 Ways to Improve Your Photography Using On-Camera Flash

WeddingPhotography_3DDisc 2: Stunning Off-Camera Flash Photography Techniques

Classic Lighting and Posing 2-DVD Set, only $39 for both DVDs

Disc 1: Classical Posing & Lighting Techniques

Disc 2: Getting the Perfect Shot at Tricky Locations WeddingPortraits_3D
The Ultimate Bundle, Everything Above For Only $239 – includes FREE Shipping Anywhere!

This is the deal of the century! It includes everything listed above at a fantastic price!

Ultimate Bundle

Look no further for the Perfect Holiday Gift! Get the ULTIMATE BUNDLE - 1 Captured by the Light Book, 1 Zumbrella, 3 Hot Shots Quick Reference Guides, and all 4 Training DVD sets. This is the Ultimate gift for every photographer.

FREE SHIPPING ANYWHERE IN THE WORLD –

USE CODE “FREESHIP

when ordering online.

Monday, November 15, 2010

Thanksgiving Specials!!!

Hi Everybody,
This is the first time we’ve offered Thanksgiving Specials, and I think you are going to like it.
The BIG news is that because of a special arrangement with the fine folks at LumaPix we are able to extend our $99 PC / $149 MAC bundled pricing (normally $299 on-line) on LumaPix:FotoFusion until midnight November 30, 2010.  That is literally the best pricing you are ever going to find on this fabulous piece of software!
Watch The Intro video below to see how you can take advantage of these great deals. Then sit back and enjoy the three webcasts one more time.

To celebrate this good news, I am also reposting our three webcasts which feature all the digital design tips an tricks we use at my studio.  Each webcast was a BIG hit with over 12,000 viewers seeing the three programs. In total, they run about 7 1/2 hours.  That's a lot of solid info for free.
The content runs the gamut of how to design wedding albums in just a few hours instead of days giving you all my tips and tricks. I showed you how to create stunning promo pieces and exciting studio products.  LaDawn did an extensive demo on how she uses her Divine Designs that the audience loved!  All three webcasts feature how we use LumaPix:FotoFusion to work our design magic.   
Here are a few comments about our webcasts.  My sincere thanks to everyone for their very kind remarks.
  • “Great job David... yay! clap, clap, clap.” Gene L. - Bothell, WA
  • “Thanks David! Great webinar!!!” Lisa P. - Washington, IL
  • “Thank you Mr. Ziser for sharing your knowledge with us.” Kim B. - Lake Havasu City, AZ
  • “Great webcast. So much information! Thanks!!!” Greg M. - Belvidere, IL
  • “Thank you very much for a great show David!” Peter C. - Aalborg, Denmark
  • “Awesome as ever. Love this programs versatility!” Kristin R. – Beaverton, OR
  • Some Great Webcast Deals!
Fast and Easy Digital Design #1 and #2
During this presentation I'll be covering all the design rules, shortcuts, tips and tricks we use at David A. Ziser Photography to create the most exciting wedding albums ever! 
I'll show you how to design an album, or any design project for that matter, in 1/3 the time it takes to do the same project in Photoshop. You will be amazed, I promise!  We can design a 150-image album in approximately 3 hours - pretty darn fast! Want to see how we do it? Watch this webcast to see how.
I'll wrap the presentation with an in-depth demo of LumaPix:FotoFusion.
Hit the PLAY button below and enjoy the show!

Fast and Easy Digital Design #2
Hit the PLAY Button below and enjoy the show!

Rocket Speed Digital Design  With LumaPix:FotoFusion
LD C2So many photographers think LumaPix is just for collage design only, but in this webcast I really gave you a thorough and detailed peek under the hood of LumaPix showing how you could use it to confer with your clients on your design projects, enhance relationships with your vendor buddies, various ways to output and share your projects and so much more.
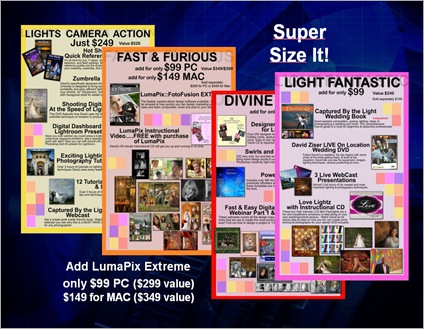
LaDawn does a great job showing the finer points of using LumaPix to create some really fabulous designs.  I quickly covered how to use “Swirls and Twirls” and LaDawn showed just how well they can enhance any project by showcasing how she puts together her Devine Designs.
The program runs about 2 1/2 hours but well worth it!  During the webcast I showed you how you can pick up LumaPix, normally $299, only $99. Does it work on a MAC, you'll have to watch the webcast for the special announcement;~) 
Hit the PLAY button below and enjoy the show!

Hey folks, I hope you enjoyed the re-broadcasts of these three webcasts.

Remember, take advantage of the special offers I mentioned in the Intro video above. Everything expires at midnight November 30, 2010.  Don’t miss out!!
CBTL Offers3
Easy Pay

Tuesday, July 4, 2000

Learn to Find, See, & Then Follow The Lines For Better Photographs

Hello Everybody,

Saying-Goodbye-To-WinterIMG_5020-Edi What a great time we had in Banff, Alberta, Canada this past April at Canadian Imaging.  I have to tell you – it was about the most beautiful place on earth I’ve ever seen.  And, I mean it!  I’ve been asked to do a guest blog post so that’s what I have for you today.  It’s a post about composition.  Let’s get right to it.

Learn to Find, See, & Then Follow The Lines For Better Photographs

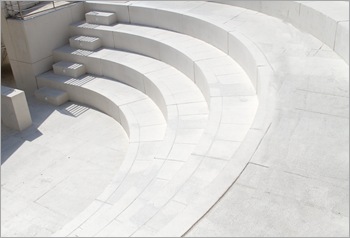
OK, here’s what the scene looks like – an outdoor auditorium, blazing sun, and 100 degrees – what are you going to do?  And, you better do it quick before you fry your subjects in the hot Tampa heat.

0001-Comp TP1-IMG_8111-Edit

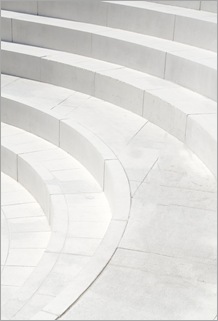
I like the lines, I like the curves – I think I can work within this space.   First thing to do will be to isolate on just the curves – let’s try framing up the shot vertically.0001-Comp TP2-IMG_8113-EditNot bad, the isolated curves now give us a nice foreground with graceful curving elements.  I also like how the curves converge to the top left corner of the frame. We now have some motion in the scene.  The curves are entering the frame from the top left and spreading through the frame.  It looks kind of cool.  Now how about I bring my subject into the frame.

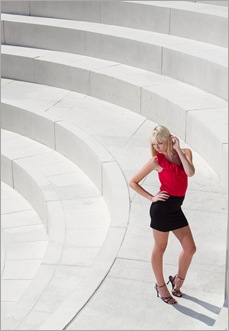
0001-Comp TP3-IMG_8123

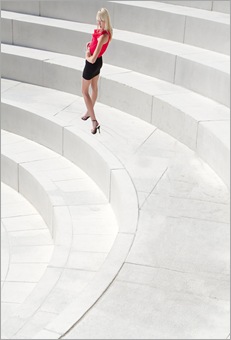
The subject’s position is important.  Notice how I have her framed up within the largest curve in the scene.  She’s framed up by the curve to the left of her right elbow.  She’s also framed by another curve just above her left elbow.  The widening two curves seem to “swoop” right in behind her.

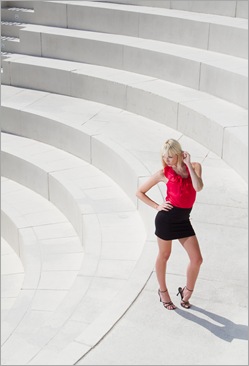
What happens if I’m not so careful and she falls out of the framing elements?  In the following image, we just miss the mark.  I’m just not compositionally comfortable with her arm hanging over the curve to her right.  I like the previous composition better.  It’s a subtle difference but still important.

0001-Comp TP4-IMG_8124

What happens if I position her in the opposite side of the composition – the top left corner?  For me, it doesn’t quite work.  The foreground seems to dominate the scene and pull viewer’s attention away from the subject.

0001-Comp TP6-IMG_8113-Edit

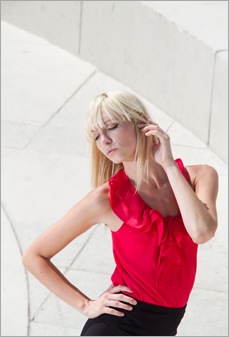
Are the curves critical to the compositional possibilities?  Is there any other subject placement that would work?  How about a closer crop?  I love it.  We no longer have a fixed identifiable structure behind her.  Now it’s pure graphic design which seems to just reach out and surround her.

0001-Comp TP5-IMG_8121

As you can see, it’s a matter of learning how to see differently.  For me it’s about pre-visualizing the scene and then determining just where I want to place the subject.  This lesson also points up the subtleties of different positions of the subject showing how I evolve into the final subject placement for the best result.  My favorites – Image #3 and #6 above.

Hey gang, I hope you enjoyed the lesson on composition today.  Looking at a scene without the subject is always my top strategy in composing a photograph.  First, I’m always looking for the lines, how do they roam through the scene, where do they lead? The lines determine how the viewer’s eye will travel thru the image compositionally . Bottom line – find out where the lines are leading and place the subject at that spot.

By the way, lighting for all these images was coming from my Quantum strobe camera left at full power triggered by Quantum FreeWire radio triggers.  Camera specs for the images was as follows: Canon 7D fitted with 18-200m  IS lens at various zoom settings, F11 @ 1/250 second, ISO 200.

Don’t forget to check out my daily blog, DigitalProTalk.com [link] for more tutorials, business building ideas, and Lightroom and Photoshop tips and tricks.  Hope to see you soon.